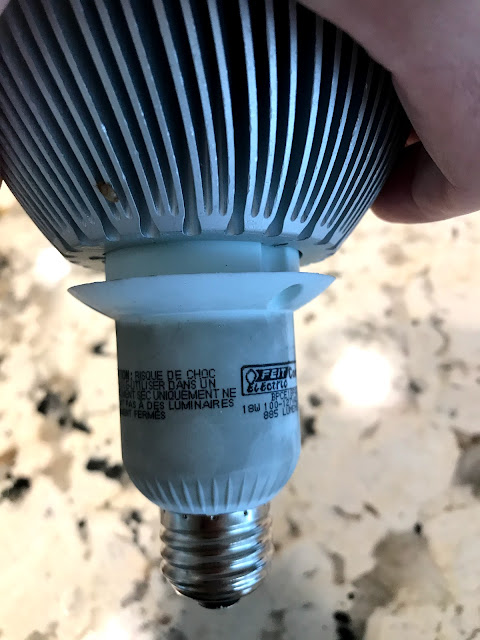
I'm not knowledgable enough to know what likely failed, but I thought that I would take advantage of the failure to see what was on the inside. I did a destructive disassembly of everything but the circuit board. I can say definitely that I did not expect the circuit board to be so complicated. I'm half inclined to open one of my newer, much lighter LED bulbs to see how they've been simplified over time.
In any event, here are the pictures of the disassembly, step by step, with my amateur descriptions of what is there. Further conclusions (if any) will be at the end.
This bulb is dominated by the aluminum heat sink that surrounds it.
Looking at the business end of the bulb - 7 actual LEDs
After removing the three screws you saw in the first picture, I was able to wiggle the top of the bulb, but couldn't remove it further. Time to try the other end of the bulb.
The plastic lens popped off without too much effort. It revealed four screws - three of which were required to remove the plastic insert plate.
Plastic plate removed, exposing the metal plate that has the actual LEDs sitting on it. Some identification markings from Feit: ALPCB0589 Rev1 which doesn't mean anything to me, or the internet. The positive and negative wires bringing the (presumably) DC power required to make the LED's go bright are exposed. I had to cut them to keep going.
Now I was able to remove the aluminum heat sink from the bulb. Here was my first surprise: the aluminum heat sink is only about half the weight of the bulb. I had assumed it was the heavy part. The core turns out to be pretty heavy too.
To keep going, I had to start breaking the center core. It was a hard, but reasonably brittle plastic that allowed me to dig down a ways. I'd eventually get stuck just using my Nest screwdriver and had to bring in more destructive tools.
Just some perspective of the working part of the bulb - it is tiny, a super thin plate.
Maybe the plate is not metal: it looks like there is a super simple (in series) circuit on the surface? Why would they choose to do it that way instead of in parallel? Seems odd.
I've broken all of the inner core that I could with the screwdriver. Inside there is silicon or some such substance around everything. The circuit board is already way more complicated than I had expected it to be.
The other side.
Using some vice grips, I pulled off the E26 connector.
The vice grips were also useful to crack off the remaining plastic. After that it was just clearing out the silicon.
Given the simplicity of the back of the circuit board, it came off in one easy piece.
Here is the top of the circuit board as much as I cleaned it off -- took way too much time even though you can see a ton of silicon still on it. The right is the 120VAC input, the right is the DC (IDK what voltage) output. I would guess that the exposed copper coils are a transformer bringing the AC voltage down. I recognize some resistors and some capacitors elsewhere, but not sure what may of the other pieces are (like the three big brown things on the top and top right of the board). I'm also not sure what the yellow covered device is (though presumably, it is an inductor). In the end, this is almost certainly a constant current power supply shoved into the bulb. It's just so complicated.
Why a constant current power supply needs multiple chips on the back is a mystery to me.
Here are my conclusions:
- First-gen LED's were heavy due to both excessively large heat sinks and the silicon goop on the interior.
- It's easy to remove the aluminum heat sink from Feit bulbs - do it and recycle.
- New bulbs are not readily accessed like this one. Likely they avoid both the big heat sink and the silicon goop. When they start breaking, I'll dig in and see how they are different.
- LEDs are pretty awesome. Based on the marking here, I likely bought this bulb in the early part of 2009. It's the early part of 2019. I'll take a 10 year replacement cycle. That being said, I'd gladly take longer.


No comments:
Post a Comment